Looking for Security Groups permissions? They are here.
Table of contents
Table of contentsI. How to start aka basic Tempus config.1. Activate the Administrator Account in the PBX.2. Install Tempus for the client.3. Give the Tempus Admin all the Permissions for Tempus.II. Configuration.1. What we need from clients.2. Loaded Modules.3. Companies4. Users4.1. PBX4.2. Add the user in Tempus5. Work shifts5.1 Creating a work shift5.2 Assigning a work shift6. Departments7. Public Holidays8. Status configuration8.2 Creating a new StatusImportant9. Sub status configuration10. Absence Pools10.1 Absence Pool Definitions10.2 Absence Pool Attribution11. System settings11. 1 Core11.2 Timelogger11.3 Interface11.4 Report11.5 Absence11.6 Home Office11.7 Overtime Calculation Period11.8 Shedule
I. How to start aka basic Tempus config.
1. Activate the Administrator Account in the PBX.
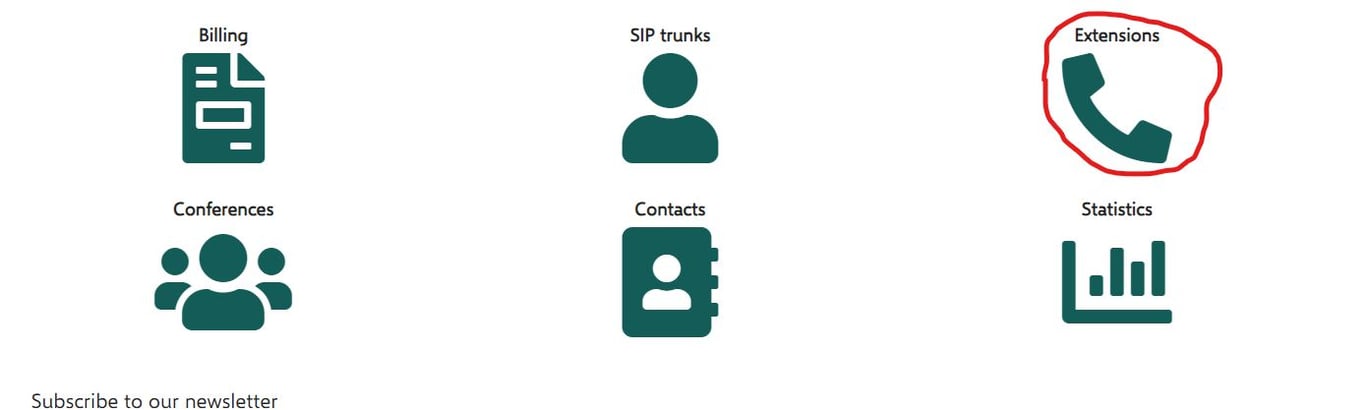
Go to the clients PBX and create a Tempus admin extension. Enter the PBX and go to Extensions :
Afterwards we create a new Extension :

Usually we take the number 9999 and call it Mixvoip Admin or Tempus Admin:

Activate Tempus for the Admin you just created:
Click on the little icon next to 9999 highlighted in yellow.

In the upcoming menu on the right, you will see under Access control “Tempus” set it from disabled to active.

Afterwards set a password for the administrator and make sure to note it down.
2. Install Tempus for the client.
Go to the clients PBX and find out their Tempus address.
A Tempus address is always composed Username.mixvoip.org
Let us take FGFC as example, type in the PID of the client 113585 You will see the following:

What we need in their first is the USERNAME, so here we have fgfclux.
Go to your browser and type in fgfclux.mixvoip.org, and you will come to the desired address.
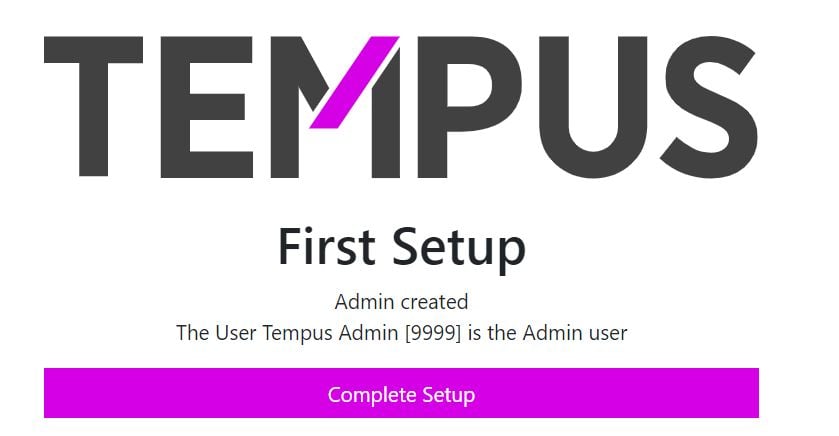
Login to the Tempus you wish to configure. The following message will be displayed:
Afterwards you will come to the entry menu :
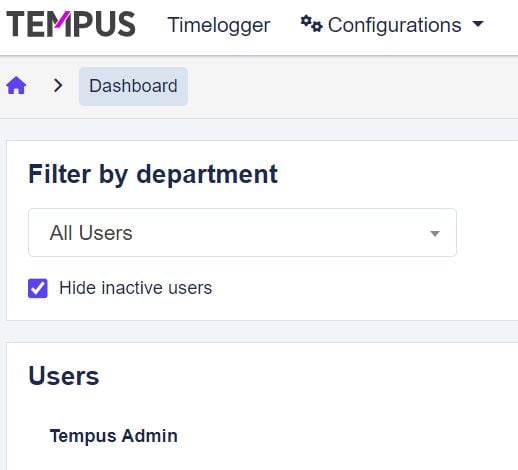
Not much will be active yet, as everything must be configured. We will go through this step by step in the later chapters.
3. Give the Tempus Admin all the Permissions for Tempus.
To be able to configure everything, and later be useful as Support. The Tempus admin will need all the Permissions to act.
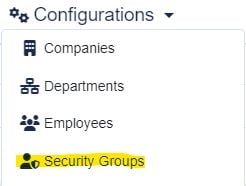
For that go to Configurations > Security Groups.
Afterwards go to the Default Admin (the first user who ever logged in by default) and click on Edit Security Group.

In the upcoming menu :
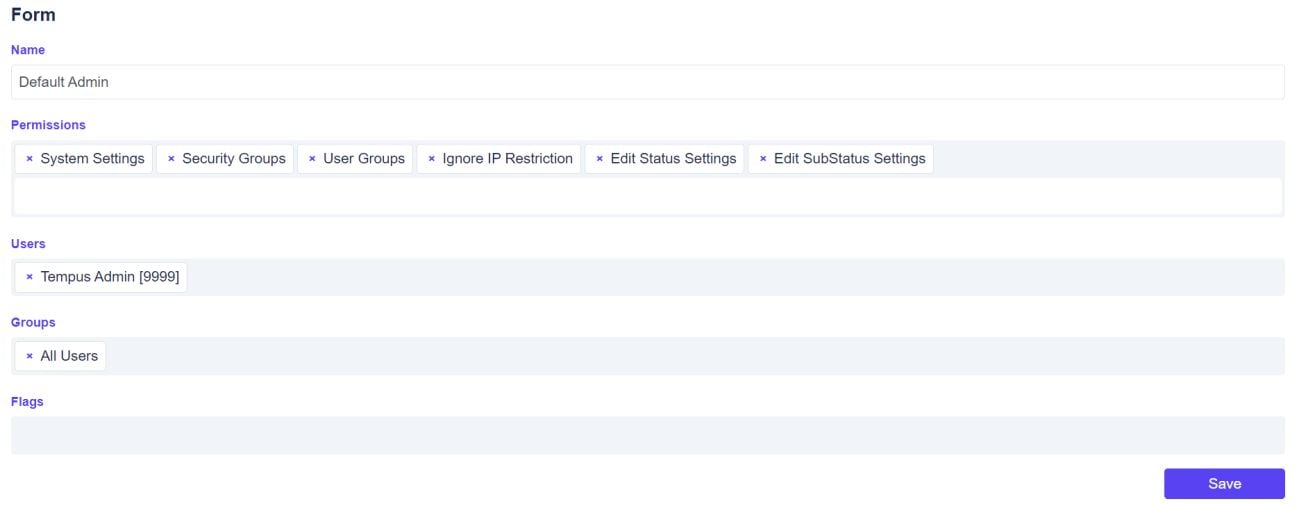
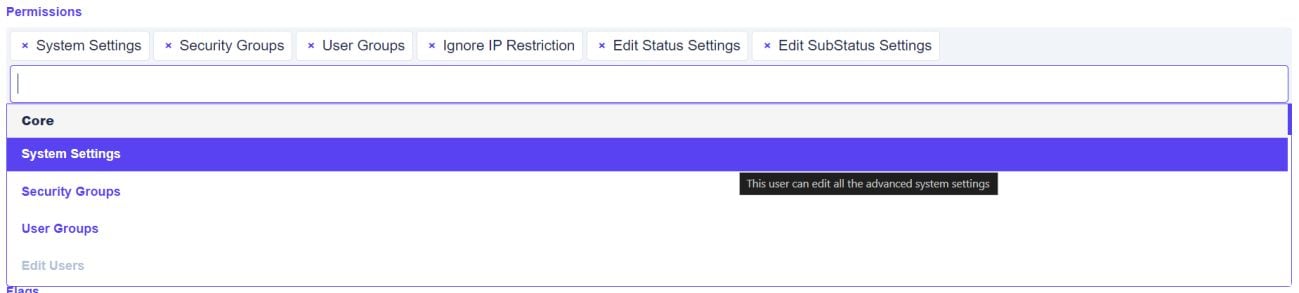
Go to “Permissions” and give the Default admin absolutely ALL Permissions over TEMPUS.
Important :
-Greyed out permissions are not yet activated to help you keep an overview. -Make sure not to activate Deny features for the admin!
Afterwards make sure that in Groups “All Users” is activated.

when you are done.
II. Configuration.
Before you start, make sure that the devs activated “Voxbi Tempus User” as active. If this is not done, you will only have a lite version of Tempus where you cannot do much.
1. What we need from clients.
To properly install any Tempus, we must start with basic information from our clients. Here is what you need to ask from them:
-Extensions on the PBX
-Email of the users should they not be in the PBX
Name / Surname -
-Entry date (start of contract)
-Work rate(100%, 50%, ...)
-Workshift (when do they work, what day, how many hours on what day, ... )
Extra Holidays if there are any to be applied -
2. Loaded Modules.
Modules are the basic options and what is displayed as options for the user. At the start there will not be much:

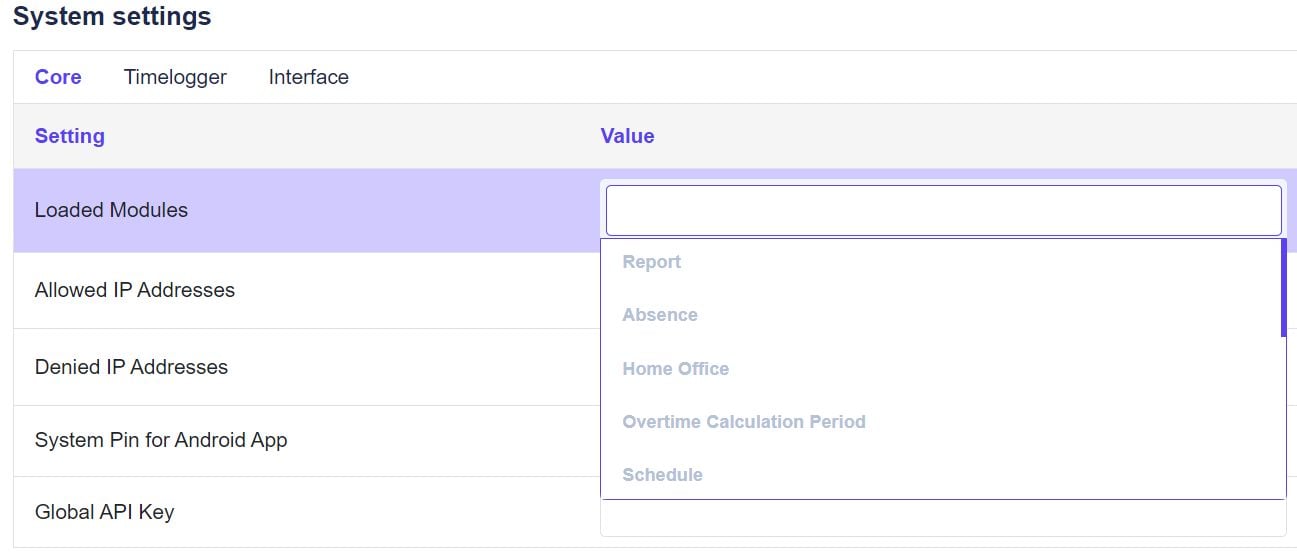
We must configure this now depending on the clients wishes, go to Configurations, and select Core Settings:

In the System settings menu, go to Loaded Modules, and select the ones you wish to have displayed and by default activated.
After that do not forget to hit the Save button on your right.

Afterwards you will see more options displayed both in the interface and the Configurations menu. Example:

3. Companies
The next step is to create a company. Usually, it is only one. But in some cases, clients can have multiple companies in one Tempus. The best Example is Mixvoip, as we have Mixvoip, Voipgate, Emios, etc...
To create a company, go to Configuration -> Companies
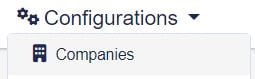
In the menu that opens, select

Fill in the Form of the company with the client's credentials. The default settings for the Country Code, Hours per week and Holiday hours per month are set to a standard Luxemburgish company.
They can be changed as needed.
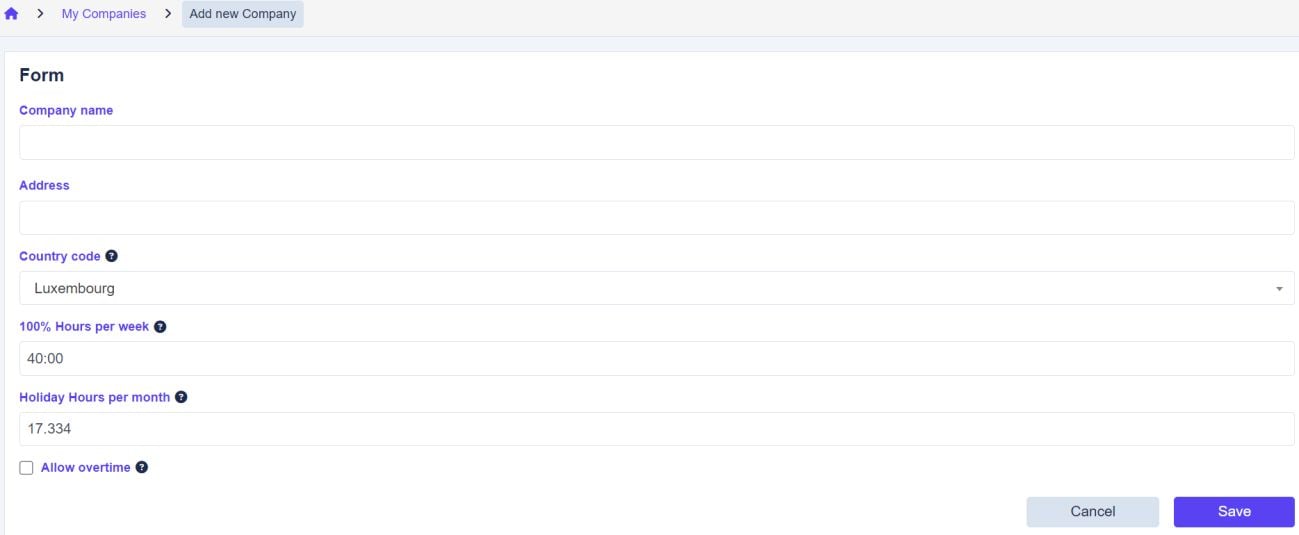
Do not forget to check “Allow overtime” if you want any hours beyond the Hours per week to be recorded.
4. Users
Once you have created your company, it is time to add users to the company. This is crucial for all future operations concerning employees. For this use the information the client was supposed to provide you with (see point 1).
Note, we only implement users in the FIRST installation. Once the client has had their training, they are supposed to handle this themselves. Or must pass by support, and they will have to pay the invested time.
4.1. PBX
A user must be added to the PBX to become activated on Tempus.
4..1.1 If the user does not yet exist: Go to the client's PBX and then to Extensions.

Afterwards we create a new Extension if the client has provided you with the extension they wish to have :

Usually, we take the number 9999 and call it Mixvoip Admin or Tempus Admin:
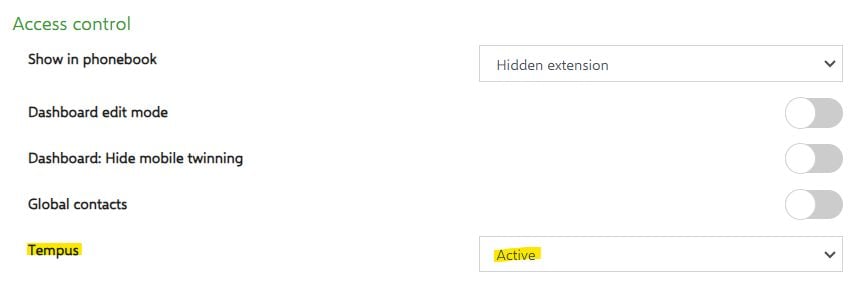
Activate Tempus for the User you just created:
Click on the little icon next to the Extension highlighted in yellow.

In the upcoming menu on the right, you will see under Access control “Tempus” set it from disabled to active.
4.1.2. If the user already exists in the PBX. Just go to the username in Extensions, click on the icon highlighted in yellow:

In the upcoming menu on the right, you will see under Access control “Tempus” set it from disabled too active.

4.2. Add the user in Tempus
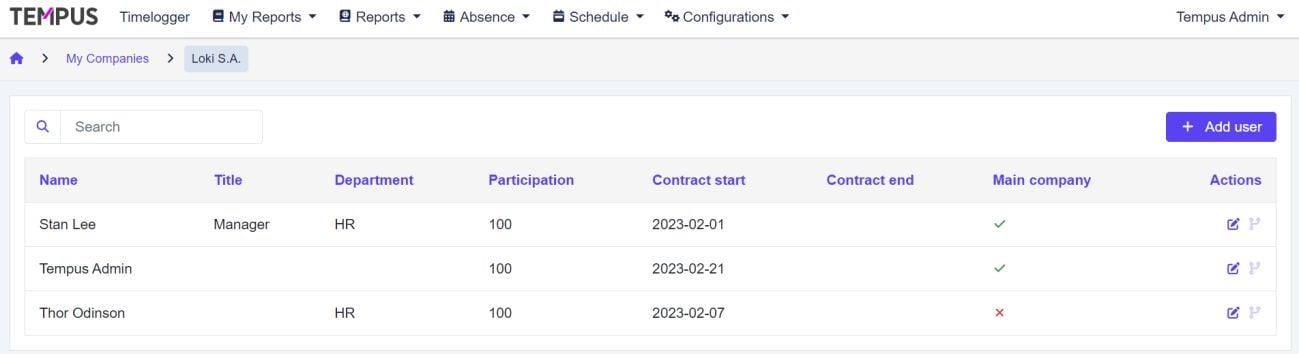
To add a user to the company you created (in point 3), return to the the company menu
(configurations > Companies)
Click on the

(View users) button on the right.This will lead you to the user overview menu. Click

and fill in the required
Data.

Very important, ALWAYS check the “Main company” box!! Not doing so will result in errors.

Afterwards the users will appear in the user's menu:
Important :
- Check if the users are active by going to Absence > Calendar. The Calendar should show up. If there is an error it will notify you with “User has no contract for this period.”
5. Work shifts
After installing the users into the system. Each of them will need their workhift properly set.
5.1 Creating a work shift
First of all, we need to create a workshift. To do this, go to Configurations > Manage Workshifts.
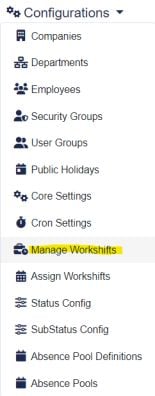
In the Manage Workshifts Menu choose.

Now you have the possibility to create a Workshift to the client's likings. Usually, a normal 40h Week consists of an example like this:
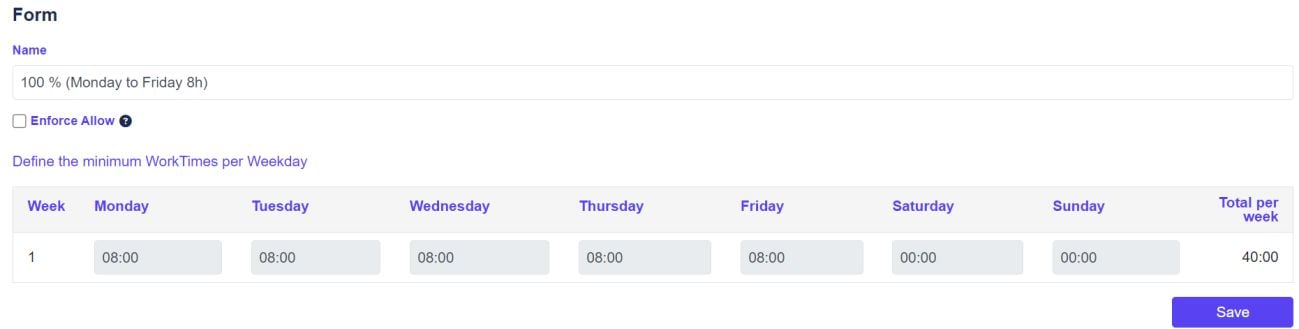
Give it a name, as in the example above, and save.
Important :
- do not check the box “Enforce Allow”! It will prevent users from changing any Status if they do overtime. Clarify this with the client first!
- If you create multiple Weeks in a Workshift with different hours per day. You must click Save after every Week, not just at the end. So, set one Week > Save. Add another row, fill it out > Save. Etc...
5.2 Assigning a work shift
Now that your Workshift has been created you have to assign it to the users.
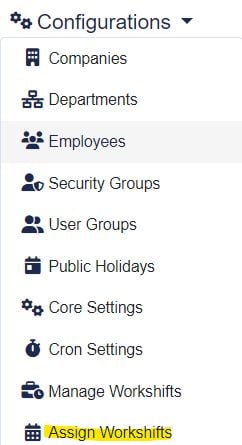
To do this go to Configurations > Assign Workshifts :
You will now see all the users you previously registered (point 4) in the opening Menu.

To assign them a workshift or edit it later on, go to the right and push.

Afterwards push on

in the upcoming menu:
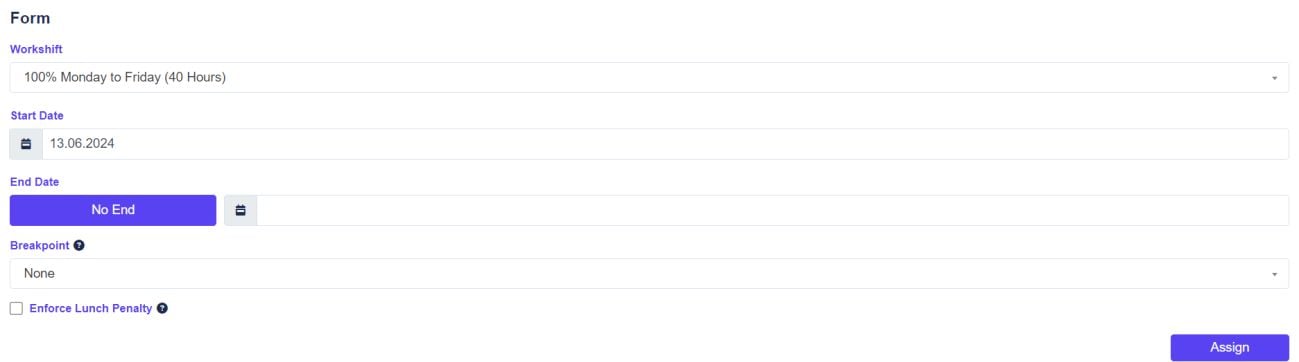
choose the workshift you previously created. Put in the starting date, and if it applies an end date. If there is no end date given put it to No End. (Breakpoint and Enforce Lunch Penalty can usually be ignored. That is up to the client if they want to use it or not and will be clarified in the Formation).
Hit Assign when you are done and the workshift should be set.
Important :
- Verify if the Workshift was set correctly. Go to Absence > Calendar and see if the users you just set up are not greyed out.
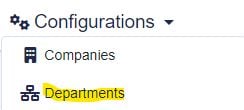
6. Departments
If the clients wish to have departments installed. Go to Configurations >Departments.
Click on

, and add a department to the client's liking. Assign a department manager and save.
Afterwards you can always assign an employee to a department.
Important:
- This does not give the Department manager ANY special rights. It is purely informal.
7. Public Holidays
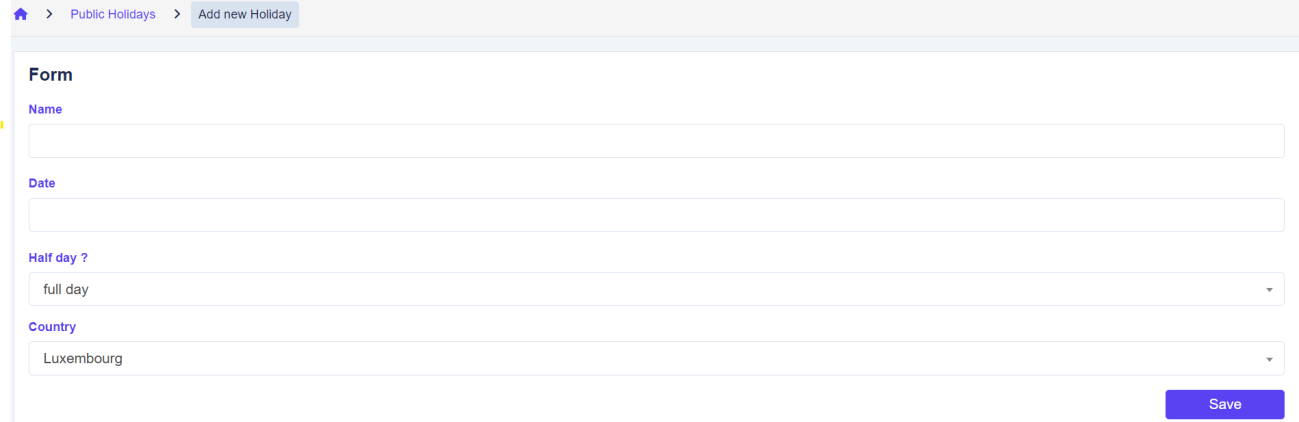
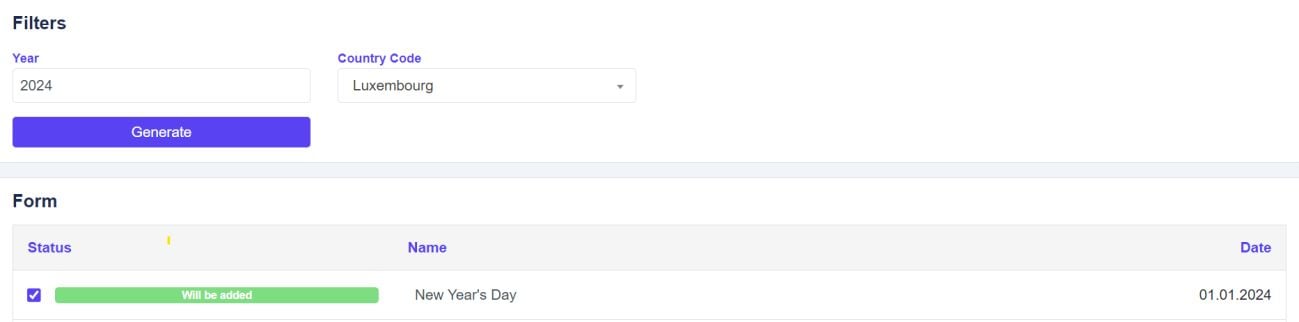
To add holidays to the client's calendar, go to Configurations > Public Holidays.
You have two options.
1.

: Add your Holidays manually, this has the advantage that you can name them however you want. And some clients have special internal holidays they want to see in their calenda
Make sure to specify if it is a full day or a half day off.
2.

: This will generate all the official holidays for Luxembourg
and add them to the client's calendar. The downside of this is that the names are predefined. The advantage is it goes faster.
8. Status configuration
The Status configuration allows you to edit the Timelogger Layout that users can see when they are on Tempus AND Voxbi.
By default, these statuses are Installed and active:

Many clients, however, wish for special layouts. 8.1 Editing a Status.
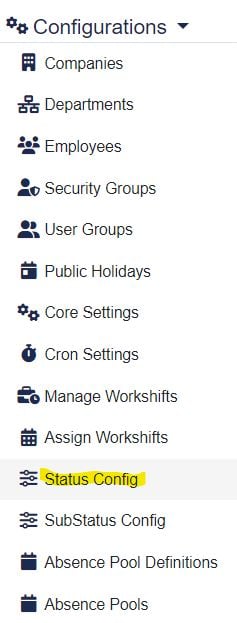
Go to Configurations > Status Config
You will now see all the active Statuses installed for the client.
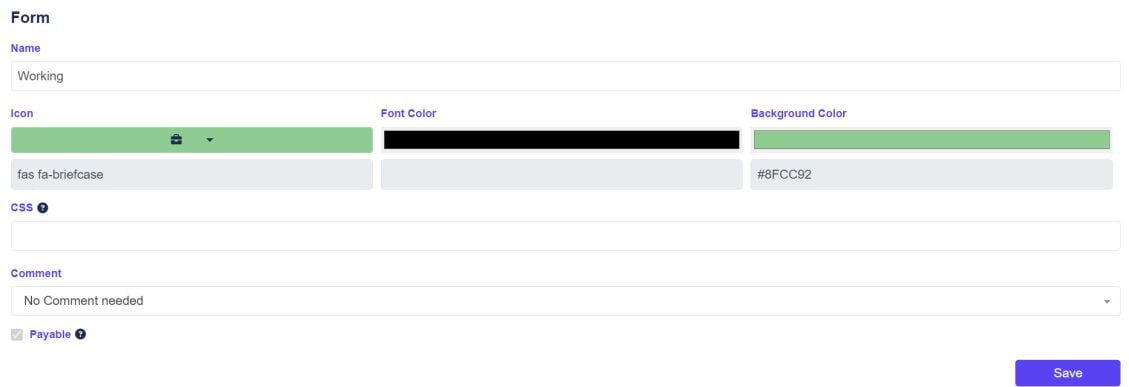
You can now either edit an existing status by simply clicking “Edit Status”

In the upcoming menu, you can change the Name, the Icon, the Font Color and the Background color.
You can also change the Size of the icon. Default size is 3, I recommend not to play around with it too much. Clients can adjust this to their tastes later.
8.2 Creating a new Status
In the Edit status and layouts menu. Go to

.
You can now create a Form to the client's likings, similar to the Editing Form.
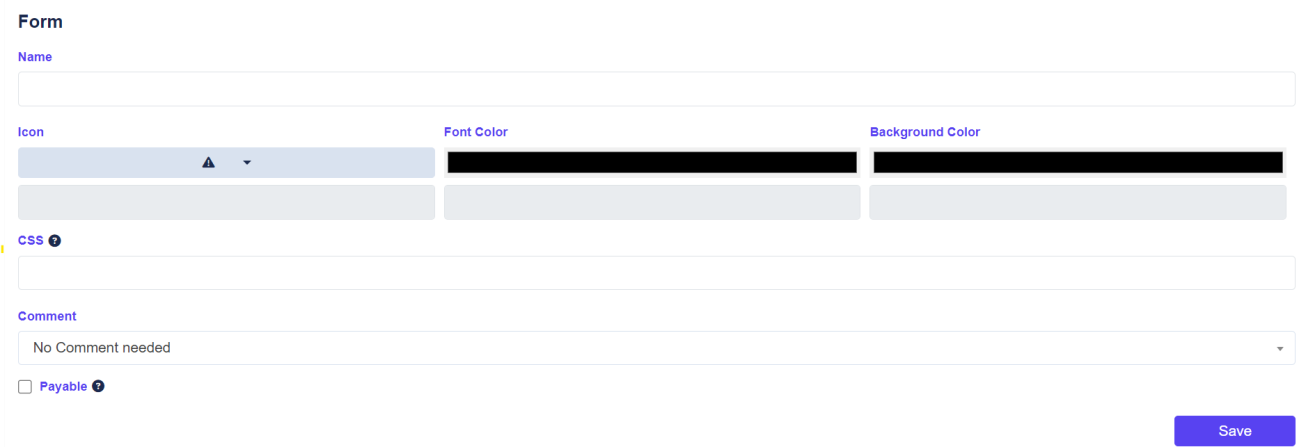
Important
- See if the status is Payable or not, and activate it as needed. If the Box is not checked and the client wants a payable status, all the calculations done by the system will be wrong.
- See if the user needs to leave a comment when changing the Status. If this is active, when changing to a specific status, they must explain why.
Creating a status does not automatically activate it. For this, it needs to be added to -
the default layout!
8.3 Managing the default Layout
Once new Status is created and edited to the client's likings. In the Edit Status and layouts Menu, scroll down until you see the Default Layout,

Click on

Edit Layout.
You can now Name your layout, activate it just for specific users. And most importantly, activate it for Tempus/Voxbi in the timelogger.
For this you simply use a drag and drop system.


You will see Button not in layout on the left and Button in Layout on the right.
If there is a Button not in the layout and you wish it to appear, left click on it and drag it to the Button in layout zone.
Or vice versa if you want to remove a button from the active layout.
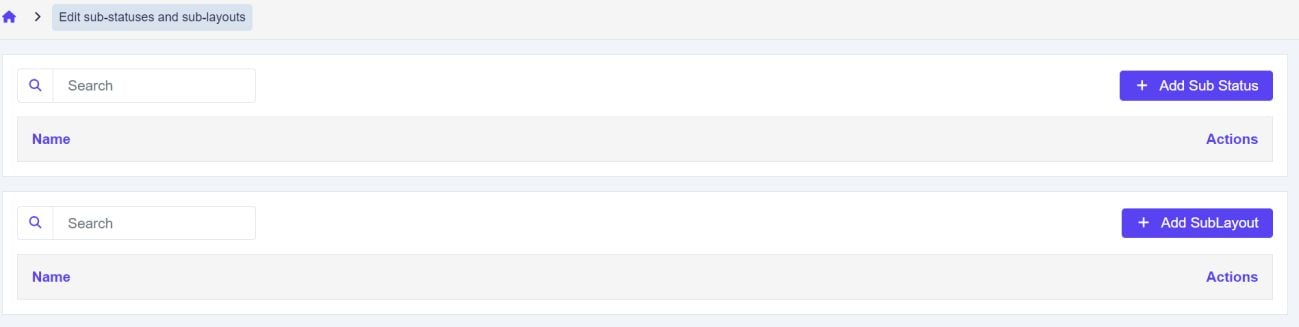
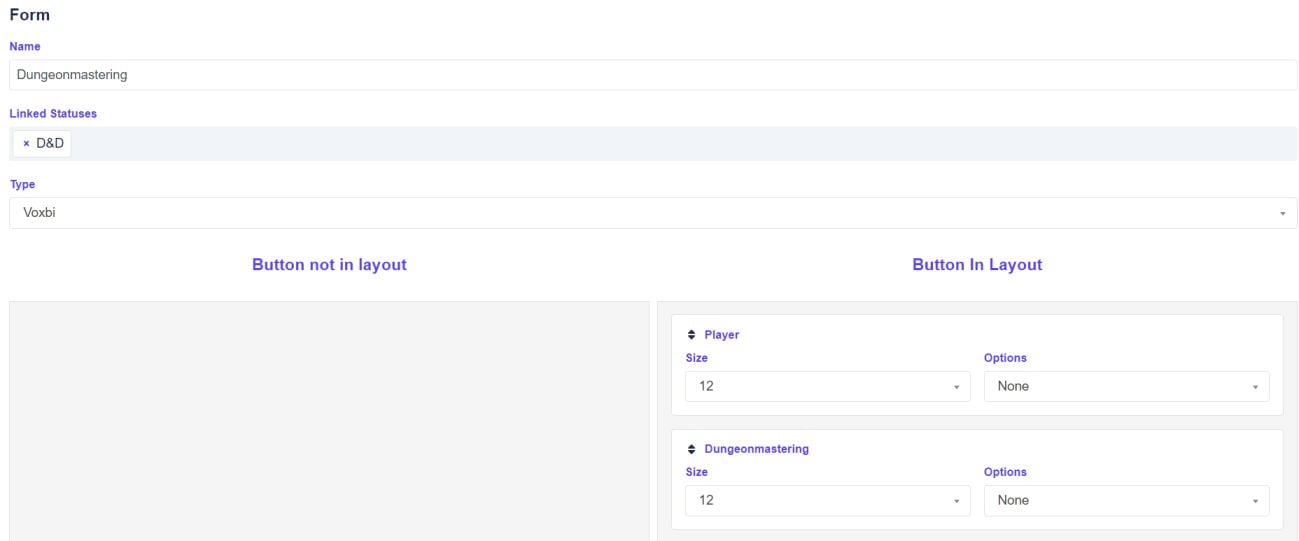
9. Sub status configuration
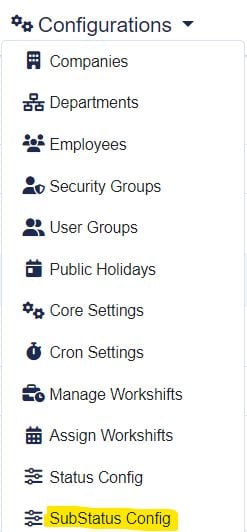
The substatus configuration allows a user to choose between a specific Status in a Main Status. To implement it go to Configurations > SubStatus Config.
This works the same wayas the Status configuration does. First create your Sub Status with + Add Sub Status, and then add it to the Layout.
The only aditional thing you need to do is link your newly created Substatus to an active
status. To do that go to Edit Substatus

in the Sublayout menu. There you will see a
Linked Statuses option. Select the Status you want, drag and drop the substatuses in the Layout, and Save.
This will allow a user to switch between the different options withing a Status. It will be displayed like this in the Timelogger when in this example they click on D&D :
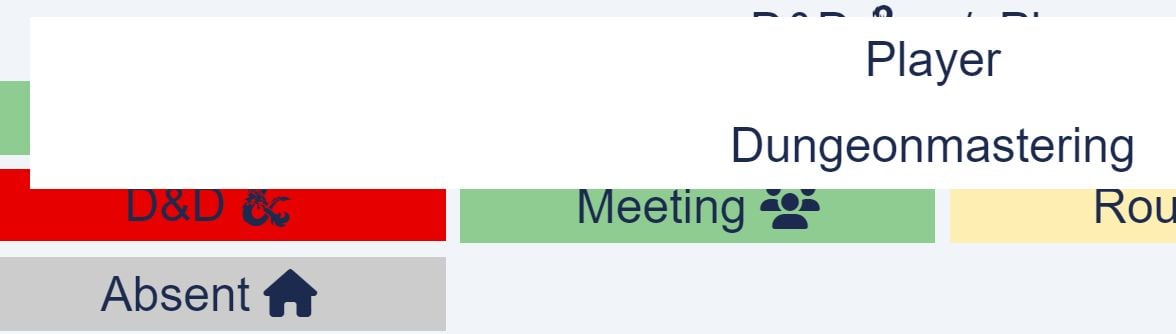
To be displayed either :

Or :

10. Absence Pools
Absence Pools are what you need to add special absences to a user, appearing in the Laters calendar.
10.1 Absence Pool Definitions
To create a new Absence pool, go to Configurations > Absence Pool Definitions
Afterwards in the menu you can see all active Absences. To create a new one click

In the upcoming window, choose the Name of the pool you wish to add, the company to wich you wish to apply the pool and make sure to pick a start and end date for the pools.
Best pick 1st January of the year in progress and then the 31st December to end it.
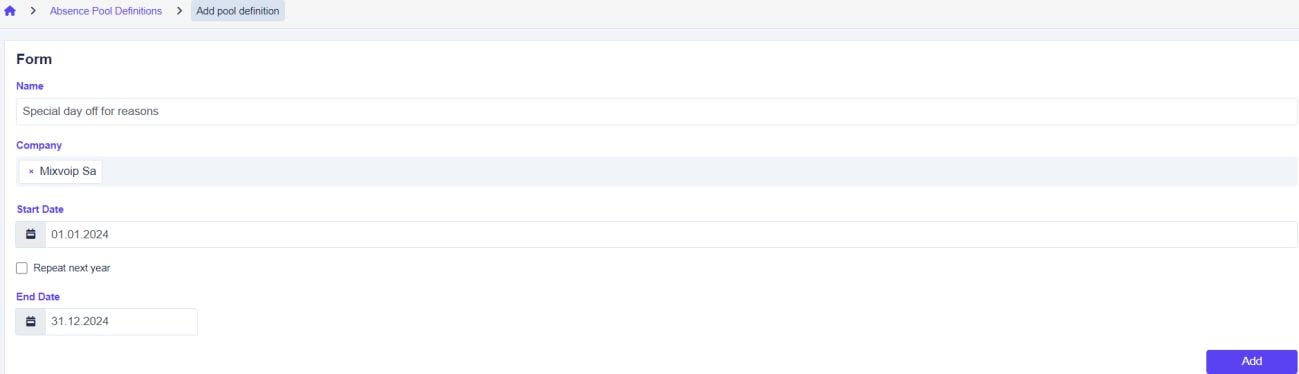
Important :
-Be sure not to activate

, to avoid the pool to be repeated endlessly.
10.2 Absence Pool Attribution
Once you created your pool in the previous step, you can assign it to a user. For this go to
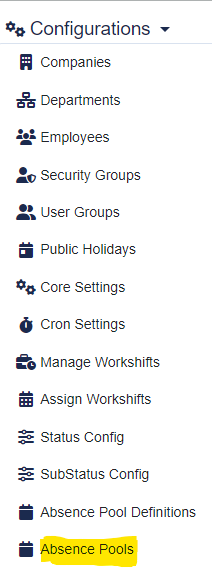
Afterwards press

In the upcoming menu fill in the form, select the Absence Pool you created and apply it to the users you want.
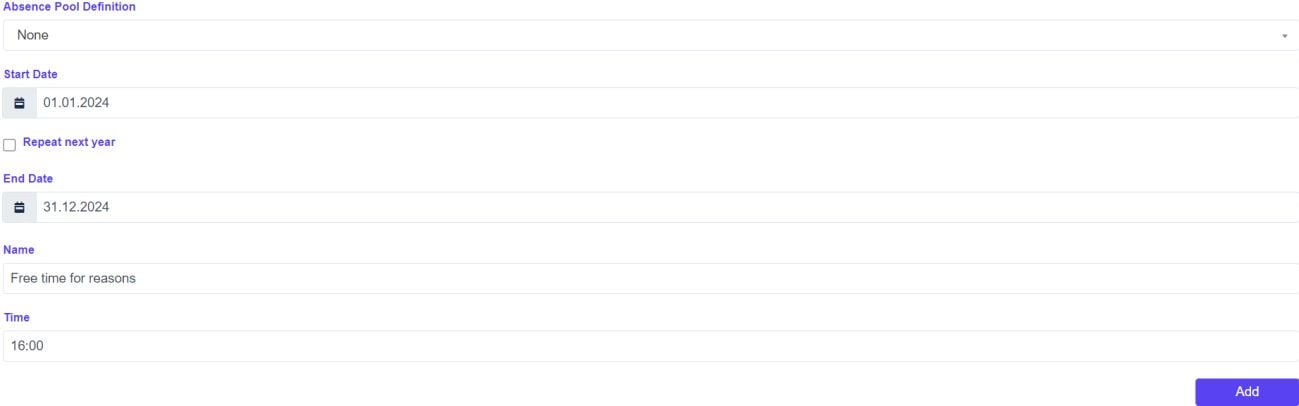
Alternatively you can create a one-time pool here as well. This one will NOT figure on your Absence Pool Definition List.
For this just set the “Absence Pool Definition” to None, then define your start and end date.
In the “Name” area type the reason for the absence and add the Time you wish to add.
11. System settings
The System settings, or the core settings, are where you must configure how the System acts depending on the client's wishes. Here you tell Tempus how the modules you loaded previously are supposed to work. I will just go over the main categories. “Notify” and “Microsoft Graph API” should be treated by a Developper.
11. 1 Core
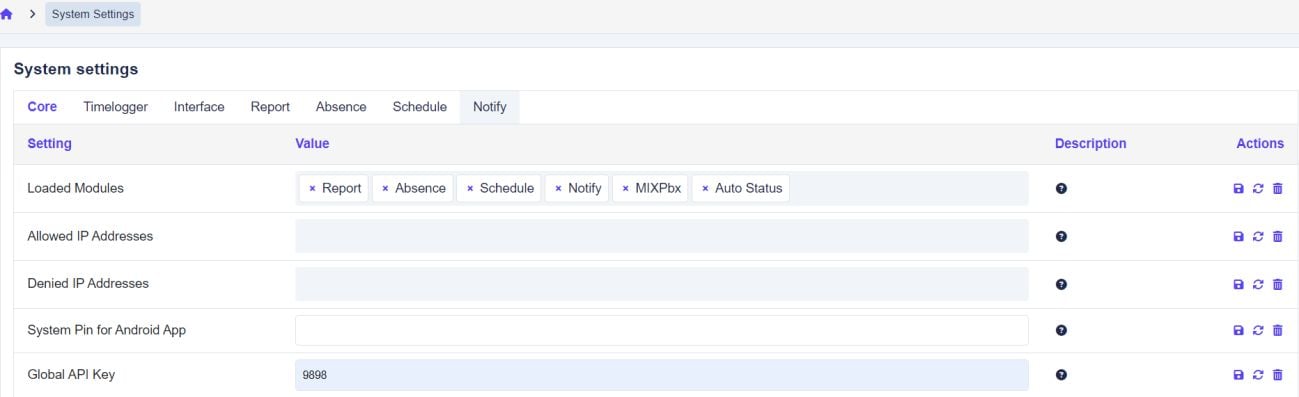
Loaded Modules: As already elaborated in the previous chapter about installing modules, this allows you to activate or deactivate all Modules a client wishes to use or not. The other settings (Allowed IP, Denied IP, System Pin and Global API Key) are generally not to be touched.
11.2 Timelogger
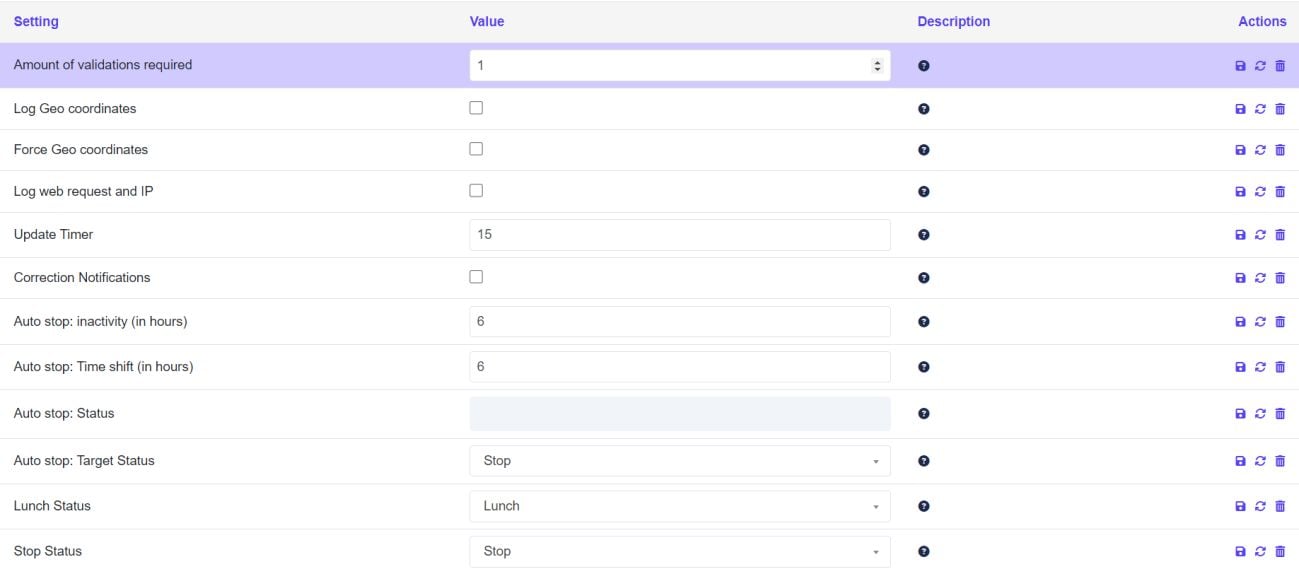
Here are a few important things to set up.
- Amount of validations, how many validations are needed for a correction or Holliday to be accepted.
- Log Geo coordinates, allows the recording of the position by gps the moment a user switches status (Phone or Computer).
- Force Geo coordinates, denies the change of a status if a user has not his geo-localization activated on the phone.
- Log web request and IP, if activated this will register the IP address of a user the moment, he switches status (by default not activated).
- Update Timer is how often the system updated. Set to 5 by default.
- Correction Notifications, sends to user and manager if corrections were accepted, denied, etc...
- Auto stop: See chapter xxx Setting up the AutoStop.
11.3 Interface
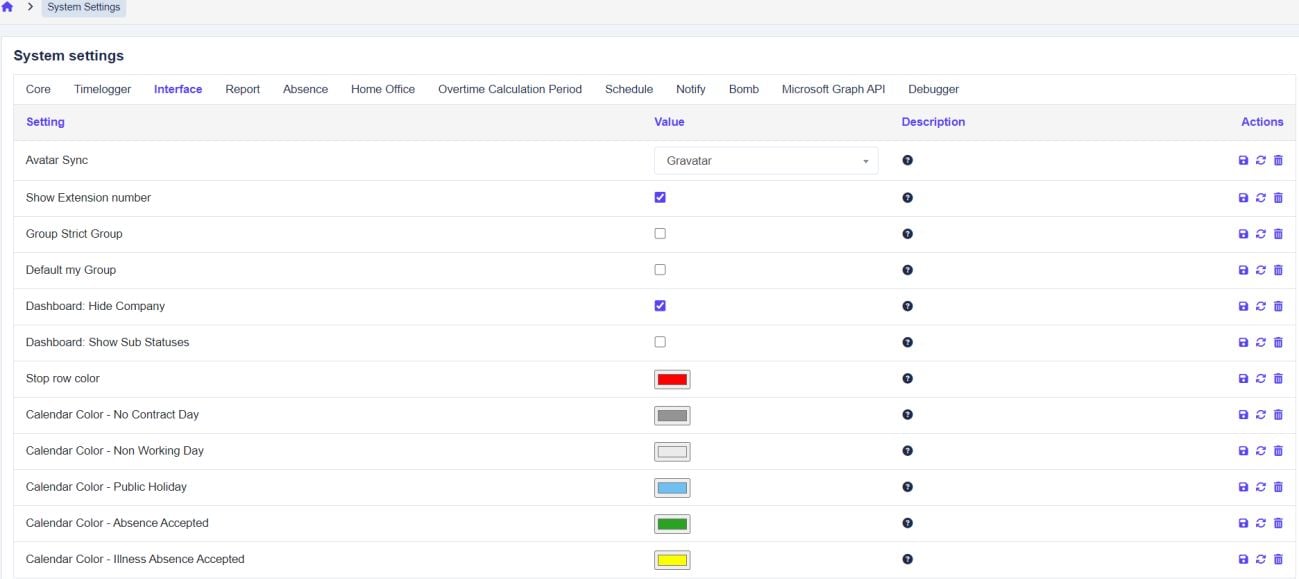
These options allow you to customize the user's dashboard, time logger and calendar. Usually this is just shown to the client during formation, and they adjust it to their likings afterwards.
- Avatar Sync: Activate the Gravatar if they use that option.
- Show Extension number, or not in the Time logger.
- Groups Strict and default, these options define what groups a user can see.
- Dashboard Hide Company hides the company name in the main menu for the users.
- Dashboard Show Sub Statuses, actives or deactivates the sub status visibility on the Dashboard.
- Calendar Color defines the colors users can see on Absence > Calendar.
11.4 Report
Here you define if a comment is needed when a user switches to overtime, or if a lunch penalty is applied:
“Lunch penalty” applies a punishment to a user if they do not take at least a given number off for lunch. This is for instance common with customers who work for the government.

“Force overtime” Many companies ask for this feature when the daily 8h (for instance) are exceeded. Just fill in the necessary data if the client asks for it:

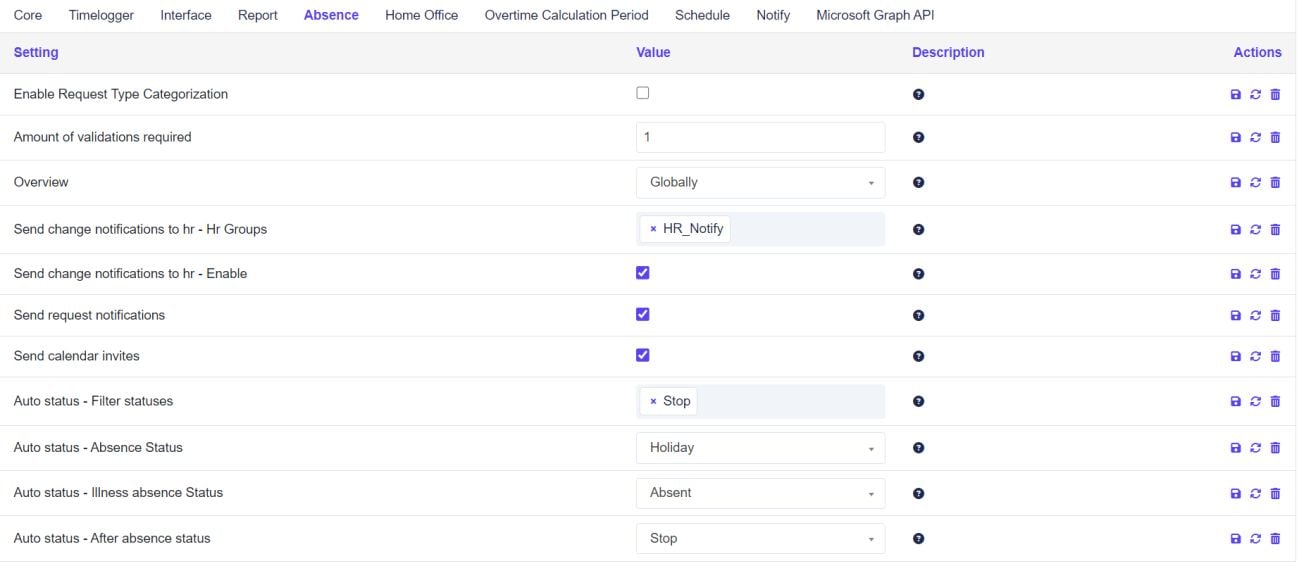
11.5 Absence
In this category you define who gets notifications about an absence request (like HR, Teamleaders, ... ) , on what status a user is set when they are going on vacation, if they are on sick leave and what happens when they end. Also how many validations are needed withing a company. By default, it is 1.
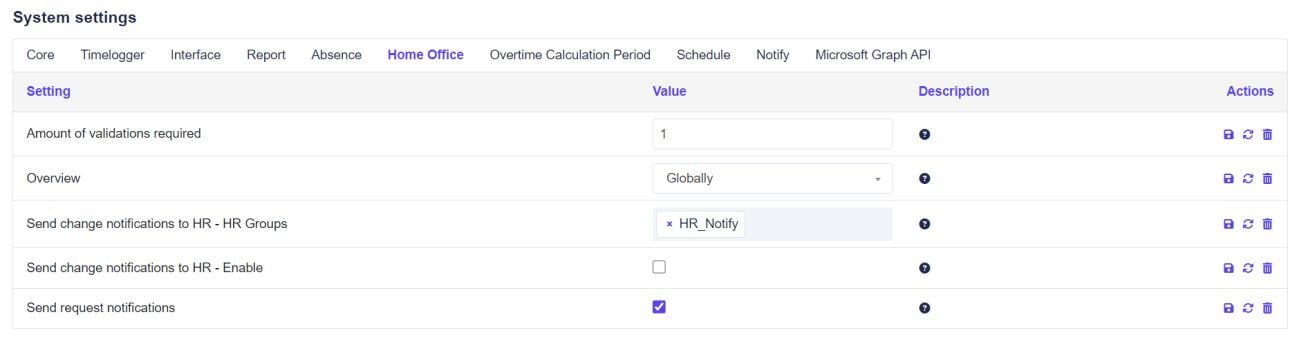
11.6 Home Office
The Home Office menu defines notifications, validations and how people can see the home office menu.
11.7 Overtime Calculation Period

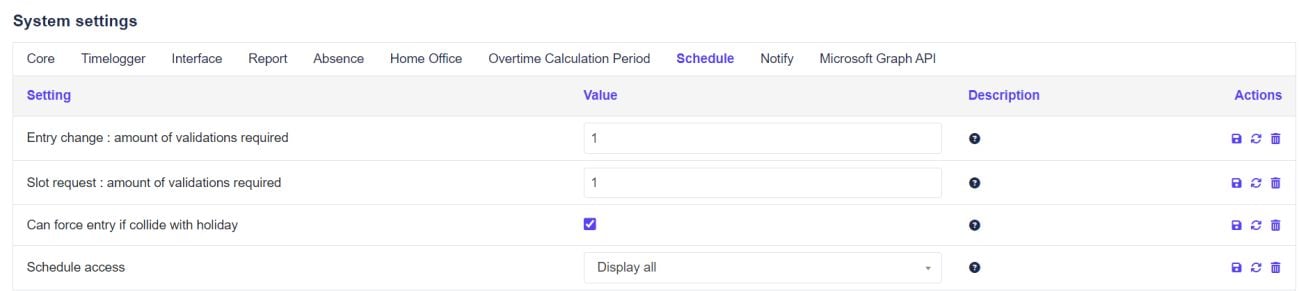
11.8 Shedule
Here you define the number of validations and the schedule access for the schedule module.